Archive | Recipes-Sweet Treats RSS feed for this section

Apple Cinnamon Muffins with Apple Butter Filling

16 Aug

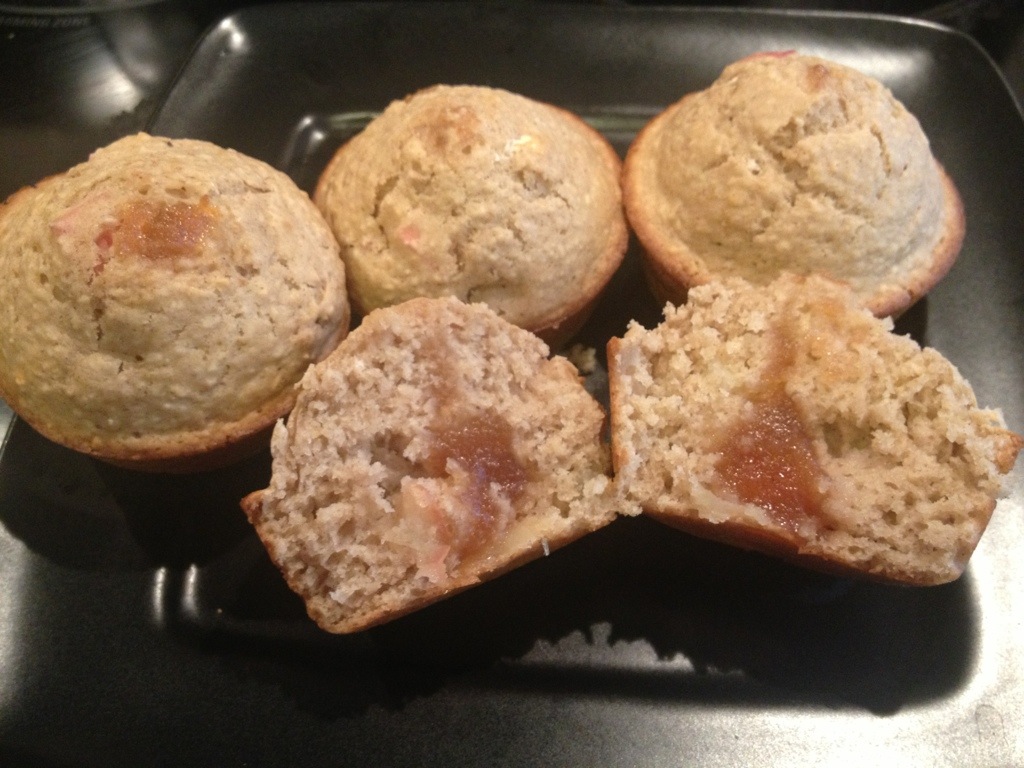
These Muffins are a “Mommy’s on a Diet” original! Far more delicious, and better yet, far lower in calories, than I could have hoped. I’m super happy with how these little gems turned out, and my kids love the little apple butter surprise in the center. You’ll be hard pressed to find another muffin under 130 calories that tastes this good!!!

Ingredients:

  • 1 1/3 cups all purpose flour
  • 3/4 cup quick cook oats
  • 1/3 cup splenda brown sugar mix
  • 2 Tsp baking powder
  • 1/8 Tsp Salt
  • 1/4 Tsp Cinnamon
  • 1/2 an apple, diced
  • 2 Egg Whites
  • 1/2 Cup 1% Milk
  • 1/4 Cup water
  • 1 Tbsp Canola Oil
  • 1/4 Cup Lite Syrup
  • 12 Tsp Apple Butter

Directions:

1. Place the Oats in a food Processor and chop until they become more like a powder or grainy flour.

2. Mix all Dry ingredients (flour-cinnamon) in a medium sized bowl.

3. In a smaller bowl, mix all wet ingredients except Apple Butter (Egg whites-Lite Syrup). Whisk together until smooth.

4. Add wet ingredients with dry, and stir until everything’s well incorporated. Add Apples and stir them in.

5. Spray a 12 count muffin pan liberally with non-stick spray.

6. Scoop 1/4 cup of muffin batter into each cup.

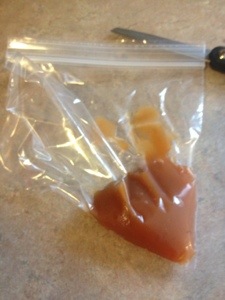
7. Spoon Apple Butter into one corner of a ziplock baggie. Carefully cut a small piece from the corner of the baggie where the apple butter is contained. This allows you to use the baggie as a piping bag.

8. Dip the cut tip of the baggie into the center of each muffin, and squeeze gently, inserting about 1 tsp of apple butter into the center of each muffin.

9. Bake Muffins on 400 for 12-15 minutes, or until they bounce back when touched on the top.

10. Allow to cool about 10 min before serving. Center is hot.

Makes 12 Muffins= 128 Calories per muffin!

Appx 3 weight watchers points plus

20140816-163437.jpg

20140816-163447.jpg

20140816-163513.jpg

Low Calorie Pumpkin Roll

11 Aug

Pumpkin Roll is one of my very favorite things about the fall. In fact, my granny makes pumpkin rolls that are so good, she would make me one every year for my birthday, and I can’t think of many things I’d rather have had. You could certainly make a smaller pumpkin roll, that was full fat, full calorie, and still not too bad for you… but you wouldn’t get a very large piece. So, I’ve made this version tonight, just to see how it stood up. I didn’t have a great deal of hope. After all, my craving bar has been set high by my dear, sweet Granny. Admittedly, this version doesn’t hold a candle to hers…but it’s pretty darn good, and much lower in calories. PS: I like to eat my pumpkin rolls frozen, because that’s how she kept mine fresh until I was home from college to get it… and I couldn’t wait for it to thaw, so frozen it was…. and now that’s just the most nostalgic way for me to enjoy them. Try it!

Ingredients for Cake:

  • 1 egg
  • 3 egg whites
  • 1/2 cup sugar
  • 1/2 cup splenda
  • 1 cup canned pumpkin
  • 1 tsp lemon juice
  • 1 cup all purpose flour
  • 1 tsp baking soda
  • 1 tsp baking powder
  • 2 tsp ground cinnamon
  • 1 tsp ground nutmeg

For the Filling:

  • 1/2 a block (4 oz) 1/3 fat cream cheese, softened
  • 1/2 tub of cool whip light, thawed
  • 1 TBSP sugar
  • 1 TBSP splenda


Directions:

1. In a stand mixer, or with an electric mixer, mix eggs, whites, sugar, and splenda on low for about 4-5 minutes.

2. In a separate bowl, mix Flour, baking soda, baking powder, cinnamon, and nutmeg.

3. Add lemon juice to egg mixture and stir. Then pour in 1/2 of flour mixture and mix until everything is well incorporated. Add 2nd half of flour mixture, and continue mixing until smooth.

4. Add pumpkin to the batter and stir until everything is well mixed.

5. Line a 10 X 15 jelly roll pan with parchment paper. Spread batter evenly over pan, and bake on 350 for about 13-15 min, until a toothpick inserted in the middle comes out clean.

6. Allow cake to cool about 5 min in pan. Then place a clean linen kitchen towel over the top of the cake. Carefully invert the cake pan, so the cake has fallen out of the pan, and is now lying on top of the towel. Peel away the parchment paper.

7. Hold the short side of the cake, and the towel beneath it, and carefully roll both the towel, and the cake together, into a log. Place this “roll” into the fridge to cool for about 30 min or so.

8: To make the filling: beat cream cheese, sugar, and splenda together until smooth. Add in cool whip and mix on low until everything is incorporated. Don’t over beat it or it’ll get too runny.

9. Unroll your “jelly roll” and spread the frosting evenly on top. Re-roll the cake with the filling inside (leave the towel on the counter this time 🙂 ).

10. Refrigerate at least 3 hours before serving. Or, I you eat it like I do, wrap in foil and freeze.


Makes 10 servings= 160 Calories per serving

Approximately 4 weight watchers points plus

20140811-161856.jpg

20140811-161905.jpg

Blueberry Orange Cheesecake with Gingersnap Crust

4 Aug

This was inspired by several things: My husband’s love for cheesecake, an abundance of blueberries in the house, and inspiration from a couple of other recipes I had recently pinned on pinterest. All in all, I was very happy with the results of this one. I liked how the orange flavor was just a hint of fresh orange, and not overwhelming. I like how the gingersnaps really mellowed out and were not too ginger-y (yes, it’s a word) in the crust. It makes 9 squares, each 3×3, which is a decent size. My husband’s only complaint is that he wanted more than 1 square…

Ingredients:

For the Crust:

  • 10 gingersnap cookies
  • ÂĽ cup pecans
  • 1 1/2 tablespoons butter, melted

For the Filling:

  • 1 block (8 oz) 1/3 less fat cream cheese
  • 1 tsp vanilla extract.
  • 1/4 cup sugar
  • 1 tbsp all purpose flour
  • 1 individual tub (aobut 5.5 oz) plain Greek yogurt
  • 2 egg whites
  • Juice from 1 large orange (use the one you zested)


For the Blueberry Swirl:

  • 3/4 cup fresh blueberries
  • 1/4 cup sugar
  • 1/4 cup water
  • Zest from one large orange (Save the rest of the orange)


Directions:

1. Put all ingredients for the blueberry swirl into a small saucepan, and heat, stirring frequently, until blueberries are soft, and mixture becomes syrupy. You’ll want to do this first, because it can take a while to cook down.

2. Place pecans and ginger snaps into the food processor, and pulse just until everything is nice and crumbly. You don’t have to pulverize them.

3. Melt the butter in a small container in the microwave.

4. Mix cookie/pecan crumbs with melted butter, and spread across the bottom of a 9×9 baking pan. Use the bottom of a glass, or other hard object to press down the crust mixture so it adheres together and stays in place in the pan.

5. If your blueberry mixture is getting syrupy, remove it from the stove, and place it in the fridge to cool.

6. Throw all of the filling ingredients into a medium sized bowl, and use a hand mixer to mix them until the mixture is smooth.

7. Use a spatula to carefully smooth the cheesecake mixture over the top of the crust, evenly.

8. Remove blueberry mixture from the fridge, and place it in the food processer. Blend until mixture becomes smooth.

9. Spoon blueberry mixture into about 4 lines over the top of the cheesecake. I only used about ½ the blueberry mixture, because it’s all I needed. However, I couldn’t successfully make a ½ size batch, so I just saved the rest. It would be good over ice cream, pancakes, or freeze it and use it the next time you make cheesecake bars! Note: My calorie count here only uses ½ this blueberry mixture.

10. Use a butter knife and drag it through the lines of blueberry, going the opposite direction of the blue berry lines. This creates your “marble” swirl look. Go up and down across the pan until you’re happy with the look.

11. Bake at 350 for 30 minutes. Remove and allow to cool on the counter for about 20 min, then place in the refrigerator for about 2 hours before serving.

1 Square= 188 Calories

Approximately 5 weight watchers points plus


20140804-092611.jpg

20140804-092620.jpg


20140810-172852.jpg

Strawberry Cream Pie with Chocolate Crust

30 Jun

This is a good pie. I am going to post the recipe, because it is very yummy… but please note: The texture is a little soft. I’m still working on perfecting it…but even with a too-soft texture, the taste is so good that I thought, for the first time, I’d post this recipe before it’s final version. (if you see this message I’m still working on it. I will remove this intro once the recipe is in it’s final stage.) What I did, was make it, and then stick it in the fridge a few hours… then the freezer to firm it up a bit. But really, i liked it just fine being soft.


Ingredients:

– 1 oreo pie crust (found with graham cracker crusts)

– 1 tub of cool whip light

– 1 small box of cheesecake pudding, instant, sugar free

– 3/4 cup milk

– 2 tsp lemon juice

– 2 packets of splenda (or 1/2 tsp)

– 3 tbsp sugar free strawberry preserves

– 1 tbsp water

– 1-2 cups sliced strawberries


Directions:

1, In a medium sized bowl, mix milk and pudding mixture until thick. Stir in splenda and lemon juice.

2. Slowly mix in coolwhip, until well incorporated.

3. Pour this mixture into pie crust.

4. In a small bowl, mix strawberry preserves and water together until smooth. Spread over top of pie.

5. Top with Sliced strawberries and refrigerate for at least 4 hours before serving.


Makes 8 Servings= 205 Calories per serving

approximately 5 weight watchers points plus per serving.


20140630-165015.jpg

20140630-165031.jpg

Cherry Lemonade Bundt Cake with Lemon Cool whip Frosting

17 May

This cake is very light, and would be great for summer. It’s the type of cake some people refer to as “poke” cake, meaning you poke holes in the cake and fill them (with jello in this case). If you love this idea, you can also check out my strawberry poke cake, or my tiramisu.

Ingredients:

  • 1 boxed lemon cake mix
  • 3 egg whites
  • 12 oz diet or “10” 7 up. ( or diet sprite, or sprite zero, or diet ginger ale)
  • 1 Tbsp lemon juice
  • 1 small box of sugar free cherry jello
  • 1 cup boiled water
  • 1/2 cup cold water
  • 1 tub of light cool whip
  • 1 cup 1% milk
  • 1 small box (4 servings) of sugar free, instant lemon pudding
  • 2-3 drops yellow food coloring (optional)

Directions:
1. Preheat oven to 350. In a large bowl, mix cake mix, soda, lemon juice and egg whites. Pour into a bundt cake pan sprayed with non-stick spray.

2. Bake cake according to directions on box. Once cake is finished, cool 30 min.

3. Once cake has cooled, use a 2 prong meat fork (or a knife, or wooden skewer) to poke many holes all the way through the cake, to the bottom of the pan.

4. Boil cup of water. Once its boiled, mix with jello until dissolved. Add cold water, mix well.

5. Pour 1/2 of jello mixture evenly over cake. Cover and refrigerate 2 hours or more. Discard remaining jello.

6. After cake has cooled 2 hours, place a large plate, or platter over the top of the pan, and flip pan over to remove cake.

7. In a medium size bowl, mix milk and pudding mix until it thickens and lumps are smooth. Fold coolwhip, and yellow food coloring (optional) into mixture until well incorporated. Ice the cake with this mixture, then refrigerate at least 2 more hours before serving.

12 Servings= 199 Calories per slice

(approximately 5 weight watchers points plus per slice)

20140517-152111.jpg

Butterscotch Bars

10 Mar

These left me on the fence, but after much consideration, i decided that this was a good recipe… but I’m just not a huge fan of butterscotch. Next time i make these, i’m going to use Chocolate pudding, and I’m really looking forward to it. The recipe itself, is a keeper.

Ingredients:
– Graham crackers (15 squares, or 30 little rectangles)
– 4 tbsp melted butter
– 2 8 oz blocks of fat free cream cheese, softened.
– 3 cups of 1% milk
– 1/4 cup Splenda
– 3 tbsp sugar
– 2 small boxes of sugar free, instant butterscotch pudding
– 1 container of lite cool whip
– 1/2 tsp rum extract.

Directions:

1. place graham crackers in food processor, and chop until finely crushed. Mix in a small bowl with melted butter. Press mixture evenly along the bottom of a 9×13 glass pan.

2. Mix cream cheese, 1/4 cup of milk, splenda, and sugar. Mix until smooth, and then spread evenly over graham cracker crust.

3. Mix remaining milk with packages of pudding, mixing until pudding begins to set. Spread pudding over the cream cheese layer.

4. In a clean bowl, mix coolwhip and rum extract until well blended. Spread cool whip mixture over top of pudding.

5. It is important to refrigerate this for at least 4 hours before serving. If you can afford to refrigerate overnight, that’s even better. The layers need to “set” and also, the rum extract needs a chance to marry with the cool whip. Otherwise, it tastes very strong.

6. Cut into 15 squares= 163 calories per serving

Approximately 4 weight watchers points per serving

*You can omit the sugar altogether with pretty good results. if you do, your calories will be 153 per serving. pp remain the same.

20140310-160305.jpg

Lemon Cake Bars

3 Mar

This is a light, lemony treat. It doesn’t have the texture of a traditional “lemon bar.” Meaning, it doesn’t have that sugary-creamy texture. Instead, it’s light and cake-y (it’s totally a word!). I love how low in calories this is, and also how totally simple it is to make. I’m thinking about making it this summer and topping with a can of light blueberry pie filling. yum. Anyway, for now, it’s simple and lemony, and delicious. Enjoy!

Ingredients:

– 1 box of angel food cake mix
– 1 (17.5 oz) can of lemon pie filling
– 1 tbsp of lemon juice
– 1/2 tbsp powdered sugar.

Directions:

1. Mix cake mix, pie filling, and lemon juice.

2. Pour into a 9×13 pan, sprayed with nonstick spray.

3. Bake for 30 min at 350.

4. Remove from oven and allow to cool about 3-5 minutes before cutting into 15 bars. Sprinkle with Powdered sugar and refrigerate for 30 min or longer.

Enjoy.

makes 15 squares

1 square= 155 Calories

1 square= appx 4 weight watchers points plus

IMG_5317[1]

Low Calorie Black Forest Cake

22 Feb

I post a lot of desserts. I love finding new “low calorie” versions of great sweets…for 2 reasons. 1. I have a major sweet tooth, and 2. A lot of people think you can’t eat dessert when you’re watching calories… and anyone who knows me, knows I can’t pass up a good opportunity to prove someone else wrong, especially if I can do it while eating cake! So, anyway, black forest cake has long been one of my favorites, and the first time I made my cool whip icing (pudding, cool whip, milk) I loved it, and I couldn’t wait to use it on 2 specific things that I had yet to create…. Tiramisu and Black Forest Cake. Now I’ve created recipes for both of those, and they are among my favorites, so I hope you enjoy. This one is DEFINITELY a repeat.

Ingredients:

– Devils food boxed caked mix (15.5 oz)
– diet cherry coke (1 can/12 oz)
– 3 egg whites
– 1 can of lite cherry pie filling (I used Kroger brand)
– 1 container of cool whip lite
– 1 small box of instant, sugar free, cheesecake pudding (the 4 serving one)
– 1 cup cold 1% Milk

Directions:

1. Mix cake mix, egg whites, and cherry coke together.

2. Pour cake mix into a 9×11 pan coated with nonstick spray, and bake according to package instructions.

3. Allow cake to cool completely. I sped this up by placing the pan on a wire cooling rack after baking.

4. Spread contents of lite cherry pie filling can evenly over top of cake.

5. Mix cold milk and pudding mix with a wisk until it begins to thicken. Fold in whole container of coolwhip until the pudding and coolwhip are well blended.

6. Spread cool whip mixture evenly over the top of the cherries, and refrigerate cake.

7. For best results with this frosting, Refrigerate at least 2 hours before serving.

Editors Note: If you really needed to eliminate sugar, you could use a sugar free chocolate cake mix, and sugar free cool whip here. However, I find that the sugar free cool whip does not allow this frosting to keep its texture as well as the lite or regular. It will still work. It just wont be as firm.

15 Servings= 185 Calories per serving

appx 5 ww points plus per serving

20140222-145452.jpg

Red velvet cookies

13 Feb

I made these in both Red Velvet and Strawberry for my daughters valentines day party at school. I really liked them both, but the red velvet were my favorite. These cookies turn out light and fluffy. You could do this in any flavor, and I’ve heard lemon is good.

Ingredients

– 1 box red velvet cake mix (15.25 oz)
– 2 egg whites
– 8 oz of cool whip (1 tub)
– 1/2 cup powdered sugar

Directions

1. Line baking pans with parchment paper.

2. Mix cake mix, egg whites, and cool whip together with a hand mixer. It will be very sticky. You may have to scrape beaters with a spoon.

3. Chill dough for 30 min or longer.

4. Use a small cookie scoop to form appx 1 tbsp scoops of dough.

5. Roll each scoop of dough lightly in powder sugar, forming a ball.

6. Place dough 2 in apart on baking sheets. (I used 2 sheets at a time)

7. Bake 8-10 min at 350. Mine took exactly 9 min. Take them out before they turn brown.

8. Allow to cool 1 min on pan and move cookies to a cooling rack to cool.

Makes 36 Cookies- only 62 calories each

20140213-234035.jpg

20140213-234052.jpg

Tiramisu

10 Dec

So, like so many other days of my life, I found myself in a hotel conference room having a staring contest with a piece of tiramisu last week. It’s one of my favorite desserts… a real treat… but I felt guilty not knowing how bad it was for me…so I walked away eating only half, and already formulating this recipe in my head. I came home and gave it a “test drive” just 2 nights later and I have to say I was VERY happy with the results. This is similar to standard tiramisu in that it’s delicious… it’s different than standard tiramisu in 2 significant ways. 1. It’s EASY to make… and 2. It’s LOW in calories! As I’m sure you’ll notice, this is based on a “poke cake” recipe I’ve used before… but it just seemed like the easiest way to get coffee Into your cake without having an overwhelming coffee flavor. yum.

Ingredients:

– 1 box yellow cake mix
– 3 egg whites
– 12 oz diet sprite (or diet 7 up, or 7 up 10, or any clear diet soda)
– 1 cup of strong brewed coffee
– 1 .3 oz envelope of unflavored gelatin
– 1 4 serving box of sugar free, instant cheesecake flavored pudding
– 1 cup cold 1% milk
– 1 tub of coolwhip lite
– Cocoa powder (about 1/2 cup total)

Directions:

1. Mix cake mix, egg whites and soda together and pour into a 9×13 pan which has been sprayed with nonstick spray.

2. Bake cake according to directions on package.

3. Once the cake is finished, allow it to cool about 5 minutes.

4. Mix hot coffee with gelatin, and mix until fully dissolved.

5. Use a 2 prong fork to poke holes throughout the cake, about 1 inch apart…which should leave you with a small hole appx every 1 inch. Poke hard enough to touch the bottom of the pan with the fork.

6. Pour coffee mixture evenly over the entire cake.

7. Refrigerate for about 2-3 hours (or overnight) before moving on to frosting.

8. When the cake has set, it’s ready to frost.

9. Place milk into a bowl, and whisk in pudding mix until it begins to thicken.

10. Once pudding has begun to thicken, gently fold in cool whip until blended, but don’t overdo it.

11. Spread mixture over cake. Sift Cocoa powder over top of cake. Cover and refrigerate at least a few hours before serving.

16 Servings= 152 Calories Per Serving!
IMG_4440[1]IMG_4452[1]