Archive | Recipes- It’s what’s for dinner! (entrees) RSS feed for this section

Cajun Shrimp Boil

30 Mar

This is a slight adaptation of a recipe I was introduced to after attending a party at a friends house, where they made this to serve.  It was so delicious, and my family loved it.  You may have seen this making it’s rounds on social media, and you can easily find the original recipe by googling “facebook shrimp boil.”  While I can’t take credit for the original version, I thought my slightly modified, lower calorie version really would be well received for our calorie counting friends here at the blog.  You can find the original recipe at Crème de la crumb.  For now, enjoy this version, which is currently my 14 yr old daughters favorite meal!

Editors Note: If using frozen shrimp, be sure to thaw them entirely and dry them off before mixing them in with the butter and seasoning.  Otherwise, liquid from the shrimp will water down your butter and the final product won’t be as delicious.

Ingredients:

  • 3 ears of corn on the cob
  • 1 pound of red potatoes
  • 13 oz of turkey kielbasa
  • 1 lb of shrimp, deveined with tails removed
  • 3 tablespoons of salted butter +
  • 1/3 cup of salted butter (used separately in 2 different parts of recipe)
  • 3 TBSP of creole seasoning
  • Salt and pepper to taste
  • 1 Lemon
  • 1 TBSP minced garlic
  • Heavy duty aluminum foil

Instructions:

  1. Preheat oven to 400 degrees.
  2. Prep your ingredients:  cut your potatoes into 2 inch pieces.  Cut your kielbasa into 1 inch slices.  Make sure your shrimp is completely dry (and not frozen). Cut your lemon in half long-ways. (one side will be used for juice, the other for garnish)
  3. Prepare your aluminum foil by tearing out (2) 12×12 sheets for each serving.
  4. In a large pot, boil your corn on the cob and your potatoes together for 10 minutes.
  5. Once potatoes and corn are cooked, remove ears of corn, and cut each one into 4 pieces.
  6. Melt the 3 TBSP of butter in the microwave in a small bowl.  After butter is melted, add in garlic, salt and pepper, Creole Seasoning, and the juice from 1 half of the lemon.
  7. In a large bowl, mix together your shrimp, sausage, potatoes, corn, and melted butter mixture.  Mix well so all ingredients are well coated.
  8. Lay out 4-5 pieces of foil (depending on how many servings you’re making) along the counter, and spray each with nonstick spray.
  9. Distribute the sausage/shrimp/veggie mixture evenly into the center of each piece of foil.
  10. Once all the food is distributed, use the remaining 4-5 pieces of foil to create the top of each packet, by placing it on top of your existing foil/food and rolling both pieces of foil tightly together around the edges, until you reach the food in the center.   Make sure your packets are tightly rolled so the juice doesn’t escape during cooking.
  11. Place each foil packet on a metal baking sheet. I can usually get all 5 packets on 2 cookie sheets.
  12. Place the baking sheets and packets into the oven and cook for 15-20 minutes.
  13. While your packets are cooking, put the remaining 1/3 of a cup butter into a small saucepan, and place the saucepan on medium heat.  You’re going to be making brown butter to top off this delicious dish.  Allow the butter to melt, stirring it regularly with a whisk.  After the butter is melted, continue cooking it, and stirring it regularly until little brown flecks start to appear in the bottom of the pan.  This is important, because you want your butter to achieve a nice nutty flavor by browning that you wouldn’t get by simply using melted butter.   Once the butter looks sort of like the bottom of the pan is covered in flecks of rust, remove it from the heat and set aside. (see pictures of brown butter process below)
  14. When the packets are done, and the brown butter is ready, carefully open each packet, and distribute the brown butter evenly between servings, just scooping it over the top of your food.
  15. Cut the remaining lemon half into wedges, and serve on the side, so people can squeeze as much or as little as they want over their shrimp boil.

Enjoy!

4 serving= 608 Calories per serving

5 servings= 486 calories per serving

Packet Assembly under way!

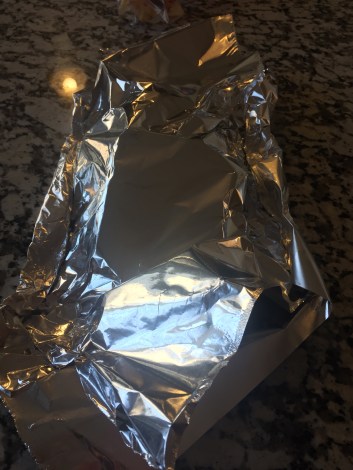
Fold your corners tightly.

Brown Butter is ready once you have this froth on top and brown specks on bottom.

Final Product, ready to serve!

Final product being served inside it’s foil packet.

Chicken Fajitas

8 Mar

This is a base recipe, for the meat and veggies used in Chicken Fajitas.  I’m going to give you the calorie counts for just this chicken and veggies, and you can decide how you’d like to serve/eat it.  It’s great in a variety of options including making fajitas with low carb tortillas, eating it over rice as a fajita bowl, or just adding lettuce, salsa, and a little sour cream to eat it “naked”.   Get creative, and you can turn this into several different meals.

Ingredients:

  • 1 1/2 lbs of boneless, skinless chicken breast
  • 1 yellow, red or orange bell pepper
  • 1 large onion, sliced
  • 1 Tablespoon of cooking oil
  • 1/2 tsp cumin
  • 1/2 tsp chili powder
  • 1/2 tsp garlic powder
  • Salt and Pepper to taste

Instructions:

  1. Preheat your oven to 400
  2. Slice your chicken breasts into uniform slices, about 2 inches long  x half an inch wide.
  3. Wash and slice your onion and pepper into thin slices.
  4. Mix the chicken strips, onions, peppers, oil, and all spices together in a medium sized bowl.
  5. Cover a pan sheet with aluminum foil, and spray with non-stick spray.
  6. Pour the contents of your fajitas onto the tray, and spread it out into a single layer.
  7. Bake on 400 for about 25 minutes, or until chicken reaches a safe internal temp.

Makes 4 servings= 265 calories per serving

Editors note:  serve with lettuce, tomato, salsa and 1 tbsp. low fat sour cream for about 300 calories!

img_5414

Mozzarella Chicken

8 Mar

This was a simple and easy dish, that I served with rice, because I really like rice with tomato based sauces.  It turned out simple, pretty quick, and yummy.  The best thing about this one is that I have all the ingredients I need on hand at just about any time, so it doesn’t take much planning.

If you like the idea of this Mozzarella Chicken, check out my other Italian Recipes here.

Ingredients: 

  • 4 (6 oz) boneless skinless chicken breast filets
  • 2 tsp olive oil
  • 1 TBSP minced garlic, or 2 fresh cloves minced
  • 15 oz can of crushed tomatoes
  • salt and pepper to taste
  • 1 tsp dried basil
  • 1 tsp dried oregano
  • 1/2 tsp crushed red pepper (optional- to taste)
  • 1 cup of shredded mozzarella cheese (part skim)

Directions: 

  1. Preheat oven to 350.
  2. Heat your oil in a large oven safe skillet, on medium heat.  Add chicken and sear until chicken is golden brown on each side, 2-3 minutes per side.
  3. Remove chicken and set it aside on a plate.  Reduce heat to medium-low and add garlic to skillet. Cook about 1 minute before adding all of the following ingredients: crushed tomatoes, salt and pepper, basil, oregano, crushed red pepper.
  4. Stir everything together well in the skillet, and cook on low about 4 minutes, stirring regularly.
  5. Return chicken to skillet nestling them into the sauce.
  6. Cover each chicken breast in 1/4 cup of cheese, and carefully place your skillet into a preheated oven.
  7. Bake until chicken is cooked through.  My breasts were on the thick side, so it took a little longer.  I recommend starting at 15 minutes and then checking regularly until internal temp reaches 165. Serve with chicken and 1/4 of the sauce per person.

4 servings= 315 calories each


 Turkey mozzarella puffed pockets

19 Feb

These were so yummy. Something I just threw together for lunch today because nothing in the pantry sounded good, and they turned out awesome.  This recipe is for 1 single pocket but you can make as many as you like of course. 1 standard box of puff pastry would make 12 pockets.

Ingredients

  • Puff pastry (1/6th of a sheet)
  • 1.5 oz of deli turkey
  • 2 tbsp shredded mozzarella
  • 1 tsp of honey mustard
  • Italian seasoning

Directions

  1. Use kitchen scissors to cut 1/6th of a sheet of frozen puff pastry and set it aside to thaw for about 10 min.
  2. The piece you cut will be rectangular.  Place it on a cutting board and roll it out into a square about 6×6 inches.
  3. Spread honey mustard evenly across pastry, then layer turkey and cheese on top. Sprinkle with Italian seasoning.
  4. Fold pastry and filling over so the turkey is eveloped inside the pastry.
  5. Pinch the edges of the pastry together sealing the turkey inside.

Bake at 400 for 15-17 minutes.

248 calories per serving

Creamy Chicken and Wild Rice Soup

13 Feb

This is another one of those recipe mash ups, where I started to crave something that I thought was probably high calorie (rice, heavy cream, butter, etc) so I did some research, compared some recipes, and came up with my own take, making substitutions and additions to get a tasty result at a lower calorie count, and I’m pretty happy with the results.  Even my “soup isn’t real food” husband ate it… which says a lot.  Because, I probably make 20 different soups, and he only eats 2 prior to this one.   I hope you enjoy it too.  Directions for stove top and instant pot are listed below.

Editors note:  Want a non-creamy, super low cal version?  I made this as a regular chicken and wild rice soup first, and then I added all the “creamy” ingredients at the end, so what I have here is really 2 recipes for 2 delicious, but different soups.  If you want to make it a regular Chicken and rice soup, leave out the 3 ingredients indented at the bottom.  It will make 9 (1 cup) servings at 120 calories each.  Next time I make this soup, i’ll take photos of the non-creamy variety and post that recipe separately, but for now… this will do 🙂

Ingredients:

  • 1 onion, diced
  • 2 whole carrots or a cup of baby carrots, diced
  • 3 stalks of celery, chopped into appx 1/4 inch slices
  • 1 lb of chicken breast, boneless skinless
  • 1 box of rice a roni (or uncle bens, or any other brand) long grain and wild rice with seasoning packet
  • 32 ounces of chicken stock
  • 2 cups of water
  • 2 Tablespoons of better than boullion, or 2 chicken boullion cubes
  • 1 tbsp dried parsley
  • salt and pepper to taste
    • 2 cups of 1% milk
    • 3 tablespoons of corn starch
    • 1 can of cream of mushroom soup

Directions:

Stovetop:

1. Warm a large soup pot on medium heat, and add about 1/2 cup of the stock, along with your onion, carrot, and celery.  Cook in the broth (adding more as you go if necessary) until the veggies start to get tender.

2. Once vegetables are tender, Cube your raw chicken, and add it to the mix with another cup or so of the stock.  Cook about 5 minutes before adding additonal ingredients.

3. Once chicken and veggies are cooked, add remaining broth, water, bullion, rice (and included seasoning packet) salt and pepper, and parsley, stirring all ingredients together.

4. Cook on low, stirring periodically, for 30 minutes.

If you want the creamy version, then continue on.  If not, stop here and eat your delicious soup.

5. Once everything has cooked together and you’re ready to get your creamy soup on, go ahead and pour the milk directly into the pot.

6. Place corn starch in a small bowl or cup, along with 1/4 cup of hot soup broth, and stir until mixture is smooth.

7. Add corn starch slurry back into the soup pot, scraping the sides of the container to make sure you get all the cornstarch into the pan.  Stir constantly for about 5 minutes until soup begins to thicken.

Once your soup has started to thicken some, go ahead and stir in the whole can of cream of mushroom soup.  Heat long enough to get everything hot, and serve.  You can let it continue cooking on simmer a while if you need to.  Just make sure to stir it periodically so it doesnt stick to the bottom of the pan and scorch.

Instant Pot:

1.Turn your pot on sautee, low, and add about 1/4 cup broth and your veggies.  Cook on sautee, stirring regularly, until veggies begin to get a little soft.

2. Add remaining broth, whole chicken breasts, water, rice with seasoning, salt, pepper, bullion and parsley into the pot.

3. Seal up your pot, close the steam valve and set on Manual, high for 10 minutes.

4. At the end of 12 minutes, quick release (QR) the pot and stir the contents inside.  Check to see if the rice is done, and if not, put back under Manual high for 3 more minutes, with QR.

5. Remove the chicken from the pot, and shred it with a fork, returning it back into the pot.

If you don’t want it creamy, here’s your chance.. you’re all done.  But if you do want it creamy, keep going!

6. Once everything has cooked together and you’re ready to get your creamy soup on, go ahead and pour the milk directly into the pot and turn the pot on sautee, low.

7. Place corn starch in a small bowl or cup, along with 1/4 cup of hot soup broth, and stir until mixture is smooth.

8. Add corn starch slurry back into the pot, scraping the sides of the container to make sure you get all the cornstarch into the pan.  Stir constantly for about 5 minutes until soup begins to thicken.

Once your soup has started to thicken some, go ahead and stir in the whole can of cream of mushroom soup.  Heat long enough to get everything hot, but remember to keep stirring or it will stick to the bottom of your instant pot and burn.  Enjoy 🙂


Makes 12 (1 cup) servings= 151 calories per serving

See below:  (photo 1:  Non creamy version, photo 2: Creamy version)


Penne and Italian Turkey Sausage

8 Feb

This was a quick, easy fix in my Instantpot tonight, but it would be super easy on the stovetop as well.  I’ll leave you directions for both.  This is a great quick and easy meal for a busy  night when you need something low in calories.  The trick is the penne.  I’ve found a low calorie penne (150 cal per 2 oz) at my local grocery store and it comes out tender and delicious just like the regular kind.  Keep in mind that my penne comes in a 12 oz box, and many of the regular types come in a 16 oz box, so you’ll have to adjust the water (if you use instant pot) and calories accordingly if you use the larger box.

Ingredients

  • 3 butterball sweet Italian turkey sausage links, sliced about 1/2 inch thick
  • 12 oz of reduced calorie penne
  • 1 container of pre sliced mushrooms
  • 1 jar of prego light smart pasta sauce (32 oz) or mommy’s on a diet homemade marinara
  • 32 oz of water
  • 1 tsp salt
  • 1 TBSP minced garlic
  • 1 tsp oregano
  • 1/2 cup white wine* (opt) or water
  • shredded parm and crushed red peppers for garnish (opt)

*white wine not included in calorie count

Directions:

Stovetop:

  1. Fill a large pot with about 4 cups of water, and bring to a boil.  Add penne and cook according to package directions.
  2. While water is boiling, warm 1 tbsp of oil in a large skillet.  Cook turkey sausage slices in the skillet until they are browned on the outside and cooked through.
  3. Use about 1/2 cup of water or white wine (opt) to deglaze the pan, meaning, pour the liquid in and use a spoon to scrape all the bits off the bottom so nothing is sticking to the bottom of the pan.
  4. Add pasta sauce, mushrooms, salt, garlic, and oregano to pan.  cover and cook on low, stirring occasionally while you continue working on pasta.
  5. Once pasta has finished cooking, drain it well.  Once mushrooms have cooked down, add your pasta to the large skillet and toss sauce and pasta together.

Instantpot: 

  1. heat instant pot on sautee function.  Add oil, and then sausages to cook.
  2. Cook sausages in oil just until they are browned on outside.
  3. Literally add all other ingredients in, starting with sauce, then mushrooms, then seasonings, then water.  Don’t stir it up.
  4. Once everything else is in the pot, add pasta.  Poke all pasta down inside the water and make sure no pasta is exposed (it won’t cook if it’s exposed).
  5. Set your Instantpot to manual for 6 minutes.  Quick release as soon as timer goes off.
  6. If there is too much liquid when it’s done, either stir it and then replace cover and leave it sitting covered in the pot for about 5 minutes: or you can stir it up and heat on sautee, adjusting the heat to “less” and stir continuously until sauce thickens.

Makes 5 servings= 378 calories per serving

Traditional Meatloaf

18 Jan

I already have 2 fantastic meatloaf recipes on this blog, which are go-to comfort recipes for me.  However, I wouldn’t call either of them “traditional” meatloaf. I recently bought an instant pot electric pressure cooker, and I found myself wanting to try a meatloaf recipe in it, but that also led me to realize I hadn’t cooked a normal, traditional meatloaf in a long time.  So, I considered all the things I loved about my 2 existing meatloaf recipes, and added what I know about traditional meatloaf, and came up with this one.  A mommy’s on a diet original.  I’ve listed the traditional oven baking directions below, with a note at the very bottom for how to do this in an instant pot.

If you like meatloaf, try my other 2 recipes for Sweet and Sour Meatloaf, and Individual Meatloaf Muffins for a different flavor!

Ingredients

  • 2 lbs of lean ground beef (I used 93% lean)
  • 25 Saltine Crackers
  • 1 (5 oz) can of tomato sauce
  • 2 eggs
  • ¼ cup of water
  • 1 tsp granulated garlic (garlic powder)
  • ¼ cup finely chopped onion (optional)
  • Salt and pepper to taste

Sauce

  • 2/3 Cup ketchup
  • 2 TBSP water
  • 2 TBSP light brown sugar
  • 1 TBSP prepared mustard


Instructions

  1. Crush all 25 of your crackers and place them into a large mixing bowl.
  2. Add beef, tomato sauce, ¼ cup water, eggs, garlic, salt and pepper to the bowl.
  3. If you’re using onions, put them in the microwave with 1 TBSP water for 30 seconds to soften, then dump into beef mixture
  4. Mix everything in the bowl together well. You can wear gloves and use your hands to do this, so you can really get in there and incorporate everything well.
  5. Form your loaf into whatever shape you like it and place it inside a baking dish that has been sprayed with non-stick spray.
  6. Bake uncovered at 350 for 40 minutes. And then remove meatloaf.
  7. Mix all Sauce ingredients together in a bowl, and pour evenly over the top of meatloaf.
  8. Increase oven temperature to 400 and continue baking 15 minutes or until center of loaf reaches 160 degrees.
  9. Remove the meatloaf from the oven, and let it rest


Makes 8 servings= 263 Calories per serving


Editors Note: If you use 96%  or 97% lean beef, decrease calories by about 30 per serving.  Add another 2 TBSP water to beef mixture before baking to try to make up for loss of moisture with lower fat content. I recommend using a higher fat content (but still lean) like 90-93% lean.

Instant Pot Directions:

To make this in an instant pot, use 1 cup of water in the pot, and add a trivet.  Shape your meatloaf and create a platform to hold it using several layers of aluminum foil.  Place your meatloaf on foil, shaping the edges of the foil loosely up around the sides of your loaf. Top with about 2/3 of the ketchup mixture. Place the foil and the loaf on to of the trivet, and cook by sealing your pressure vent, selecting manual, 40 minutes, high pressure. Allow you can quick release the steam (QR).  Remove the meatloaf from the pan by lifting the trivet handles before taking the temp of the meat (if you take the temp inside the very hot pot, it will not give you an accurate reading) Use a digital meat thermometer to test center of the loaf, and if it hasn’t reached 160, place back in for 5 additional minutes at a time, QR, until temp is reached.  Once it’s done, spread remaining ketchup over the meatloaf, take it out of the pot and stick the meatloaf, foil and all on a baking sheet and throw it all under the broiler for a few minutes until ketchup is thick and sticky.  Allow the meatloaf to sit for 5-10 minutes before cutting.  Enjoy 🙂


Mississippi Pot Roast

16 Jan

This recipe is crazy popular on the internet.  I have seen variations of it all over the web, and nearly everyone gives it 5 stars, so while i thought the combinations of flavors were unique, and I wasn’t sure how it would meld together, I decided to give it a try anyway.  I can’t take credit for the idea of mixing these ingredients together. However, i will take credit for putting a slight spin on it, in that i’m going to make it in the Instant Pot I recently purchased, I’m using pepper rings instead of whole peppercinis (i think they’ll be easier to eat) and I’m going to use light butter and bulk up the recipe with some veggies to make it a little more calorie friendly.  I will give slow cooker (crock pot) instructions below as well, since I know many of you may not have a pressure cooker available.

Editors Note: On second thought…Make the Gravy. This is literally the best brown gravy i’ve ever made in my life.  It is very rich and flavorful!

Ingredients:

  • 2.5 lb roast (I used lean, top round)
  • 1 envelope of Ranch dressing mix
  • 1 envelope of dry au jus mix
  • half a 16 oz jar of banana pepper rings + 1/2 cup of the juice
  • 2 TBSP oil of your choice
  • 4 TBSP of light butter (50 cal per tbsp)
  • 1 can of beef broth (only if you’re using an Instant Pot. not needed for crock pot)
  • 1 onion, quartered, Baby Carrots and 12 little potatoes (optional, not included in calorie count below. please track calories for veggies separately based on what veggies you use)

Editors Note: Note, I am using whole small potatoes with the skin on.  There is not much liquid starting out in this recipe if you’re using the crock pot, so i’d be afraid to use cut up potatoes with the inside exposed, as they might oxidize and turn black during cooking. If using the Instant pot, cut up potatoes or even turnips or radishes would work.

Instructions:

If using a Crock pot:

  1. Use paper towels to dry the meat well.  Salt and pepper meat to taste.
  2. Heat oil in a skillet and brown the meat on all sides to seal in the flavor once it begins to cook.
  3. If you’re using the veggies, toss them into the bottom of the crockpot here.
  4. Place meat in crockpot, and pour envelops of au jus and ranch directly on top of the meat.  Rub spices into the top and sides of the meat the best you can. Place peppers (but not juice yet) on top of the meat along with the butter.
  5. Pour the pepper juice around the sides of the meat.
  6. Cook on low 6-8 hours.
  7. Shred or slice the beef.  Remove the veggies for serving. Serve with or without peppers.  You can use corn starch to thicken the remaining juices into a gravy if you like (calories for corn starch not included here).  If this is something you want to do, remove your meat and veggies, pour the juice from the crockpot into a small pan. Disolve the cornstarch into about 1/2 cup of water. Pour cornstarch slurry into your pan drippings and whisk until thickened.

If using the Instant Pot (IP) electric pressure cooker

  1. Use paper towels to dry the meat well.  Salt and pepper meat to taste.
  2. Turn your IP on saute and wait for it to become hot. Heat oil in the IP and brown the meat on all sides to seal in the flavor once it begins to cook.
  3. Remove meat from IP and pour in pepper juice and broth. Deglaze the pan by scraping off all the bits of meat that stuck to it during browning.
  4. Place meat inside the IP, and pour envelops of au jus and ranch directly on top of the meat.  Rub spices into meat the best you can. Place peppers on top of the meat along with the butter. Don’t put your veggies in at this point or they will turn to mush.Leave them out. We will get to those later 🙂
  5. Using the Manual setting on your IP, set the timer to 60 minutes at high pressure.  Make sure your steam vent is in the closed position.
  6. Once your 60 minutes is up, allow the IP to depressurize naturally (NPR) for 10 minutes before Quick releasing (QR) the remaining pressure.
  7. At this time, open the IP up and check your meat for doneness.  If the meat is tender, and at 180 degrees in center, you’re good to go.  If not you might try bringing it back to pressure in 10 min intervals using QR until it reaches the texture you like.
  8. Once meat is a good texture, add veggies into the pot around the meat.
  9. Use the manual setting again, with the pressure valve closed, and set the IP for 6 minutes.
  10. Cook for 6 min and then Quick Release.
  11. Cut or shred your meat, and remove veggies.  Serve with or without the peppers. You can mix about 2-3 tbsp of cornstarch with some water, and add into the broth if you wish to make gravy.  Just use the saute feature on the IP and wisk the mixture together until it thickens.  Note that corn starch* and veggies are not counted in the calories shown below.

Makes 6 Servings.  Calories reflect meat only. Calculate Veggies separately based on what veggies you choose to use.

6 Servings= 343 Calories per serving

*If you use 3 TBS of cornstarch to thicken the gravy, and still have 6 servings, calories are slightly increased to 358.

Low Calorie Homemade Pizza

10 Jan


So, this recipe is officially for pizza, but some folks don’t wan to go through the trouble of making sauce or they already have store bought sauce on hand.  Also, everyone likes different things on their pizza.  So I’m going to give you 2 things here.  I’ll give you the recipe for just crust, along with calorie count, and then I’ll give you my recipe for a cheese pizza.  That way if you make your own pizza, all you have to add are the calories associated with whatever toppings you choose to use.  This turned out much better than I expected.  In fact, the family loved it and it’ll definitely be making a return visit to my dinner table.

Crust Ingredients:

  • 2 single serve containers of plain greek low fat yogurt
  • 3 cups of self rising flower
  • 2 tablespoons of water

That’s it.  Yeah, I know. This sounds crazy, but it’s good I promise. Mix it together, knead with your hands for about 5 minutes, and voila!  Spray a large baking pan with sides down with nonstick spray.  Roll your dough out evenly to the edges of the pan, pressing any extra little dough up against the sides.  Use a fork to poke some holes throughout the crust and top your pizza with everything you want on it before baking. (13 min at 475).  Continue on if you wish to use my sauce recipe.

Pizza Sauce:

  • 2 6 oz cans of tomato paste
  • 2 tablespoons of water
  • 1/4 tablespoon of granulated garlic (garlic powder)
  • 1/2 tsp of oregano
  • 1/4 tsp of basil
  • just a dash of onion powder if you like it.

Instructions:

Mix ingredients together in a bowl and spread evenly over crust.

To make Cheese pizza:  add 2 cups of shredded mozzarella cheese and bake at 475 for 13 minutes.

Makes 5 average servings  or 4 pretty large servings. Cut into 15 slices (5 smaller servings, 3 slices each) or 8 large slices (4 servings, 2 slices each)


4 servings: Crust only= 345 calories             4 servings: Cheese Pizza = 580 Calories

5 servings: Crust only = 275 calories           5 servings: Cheese Pizza= 464 Calories


I used turkey pepperoni, turkey sausage, and fresh mushrooms on my pizza pictured here. Well.. parts of it. The lower bottom right quarter is just cheese for my picky kid:

pizza-2             pizza-1


Italian Meatball Sliders

26 Oct

This is a recipe that I originally tried through a home delivery service.  I ordered it, made it, liked it, but I saw a lot of opportunity to alter it and make it more calorie friendly, so that’s exactly what I did.  This is one we’ve eaten about 3 time in my house now, and the kids love the little surprise of melted cheese in the middle.  The husband loves that he can have a “meatball sub” basically for much lower calorie count. Either way, this one is a winner, and I hope you guys enjoy it too.

Ingredients:

  • 1 lb of lean beef (i used 92%)
  • 1 tsp garlic powder
  • 1 egg
  • 1/3 cup of bread crumbs
  • salt and pepper to taste
  • 1/4 cup of shredded parmesan cheese (shreds, not powder)
  • 2 low calorie mozzarella string cheese sticks*
  • 1 cup of prepared pizza sauce
  • 8 mini slider buns*

Directions:

  1. Preheat oven to 450. Prepare a baking sheet by covering it with foil.
  2. In a medium sized bowl, mix together: Ground beef, garlic powder, egg, bread crumbs, parmesan cheese, and salt and pepper to taste.  Mix thoroughly using a spoon or clean, bare hands.
  3. Place the mozzarella sticks on a cutting board and cut them each into 4 even segments.
  4. Form 8 meatballs from the ground beef mixture you’ve made and spread them evenly over the foil lined baking sheet.
  5. Use your thumb to press a deep well in the center of each meatball, large enough to insert one of the pieces of mozzarella.
  6. Shape the top of the meatball to cover the mozzarella, sealing the cheese in tightly so it reduces the amount of overflow that occurs during cooking/melting.
  7. Bake the meatballs for 25-30 minutes in the oven.
  8. Once meatballs are done, remove meatballs and foil from the pan and place the buns on the baking sheet, tops and bottoms separated from one another so the center of the bun is facing up.
  9. Place the buns into the oven and broil breifly until they are lightly browned.  Don’t take your eye off of them… it doesnt take long to go from lightly brown to “somebody call the fire department!”
  10. In a small skillet, heat the pizza sauce to warm, and place meatballs, cheese side up into the sauce.  Use tongs to move meatballs around just enough to pick up some sauce on the outsides.
  11. Remove buns from oven, and place 1 meatball on each bottom bun.  Spoon a little sauce over the top.  Sprinkle with extra parm if you’ve got it, and place the top bun over the meatball.  Enjoy.

*Editors note:  I used premade slider buns that were 80 calories each. My cheese sticks were 50 calories each.  You can freeze the cheese sticks ahead of time if you feel yours melted too much during cooking.

Serving size= 2 Sliders   446 calories

Serving 1 slider= 223 calories

**NOTE: I am no longer following weight watchers and am no longer comfortable calculating weight watchers points values with any accuracy.  Please feel free to use your ww recipe builder to calculate points if necessary.

meatball