This was a quick, easy fix in my Instantpot tonight, but it would be super easy on the stovetop as well. I’ll leave you directions for both. This is a great quick and easy meal for a busy night when you need something low in calories. The trick is the penne. I’ve found a low calorie penne (150 cal per 2 oz) at my local grocery store and it comes out tender and delicious just like the regular kind. Keep in mind that my penne comes in a 12 oz box, and many of the regular types come in a 16 oz box, so you’ll have to adjust the water (if you use instant pot) and calories accordingly if you use the larger box.
Ingredients
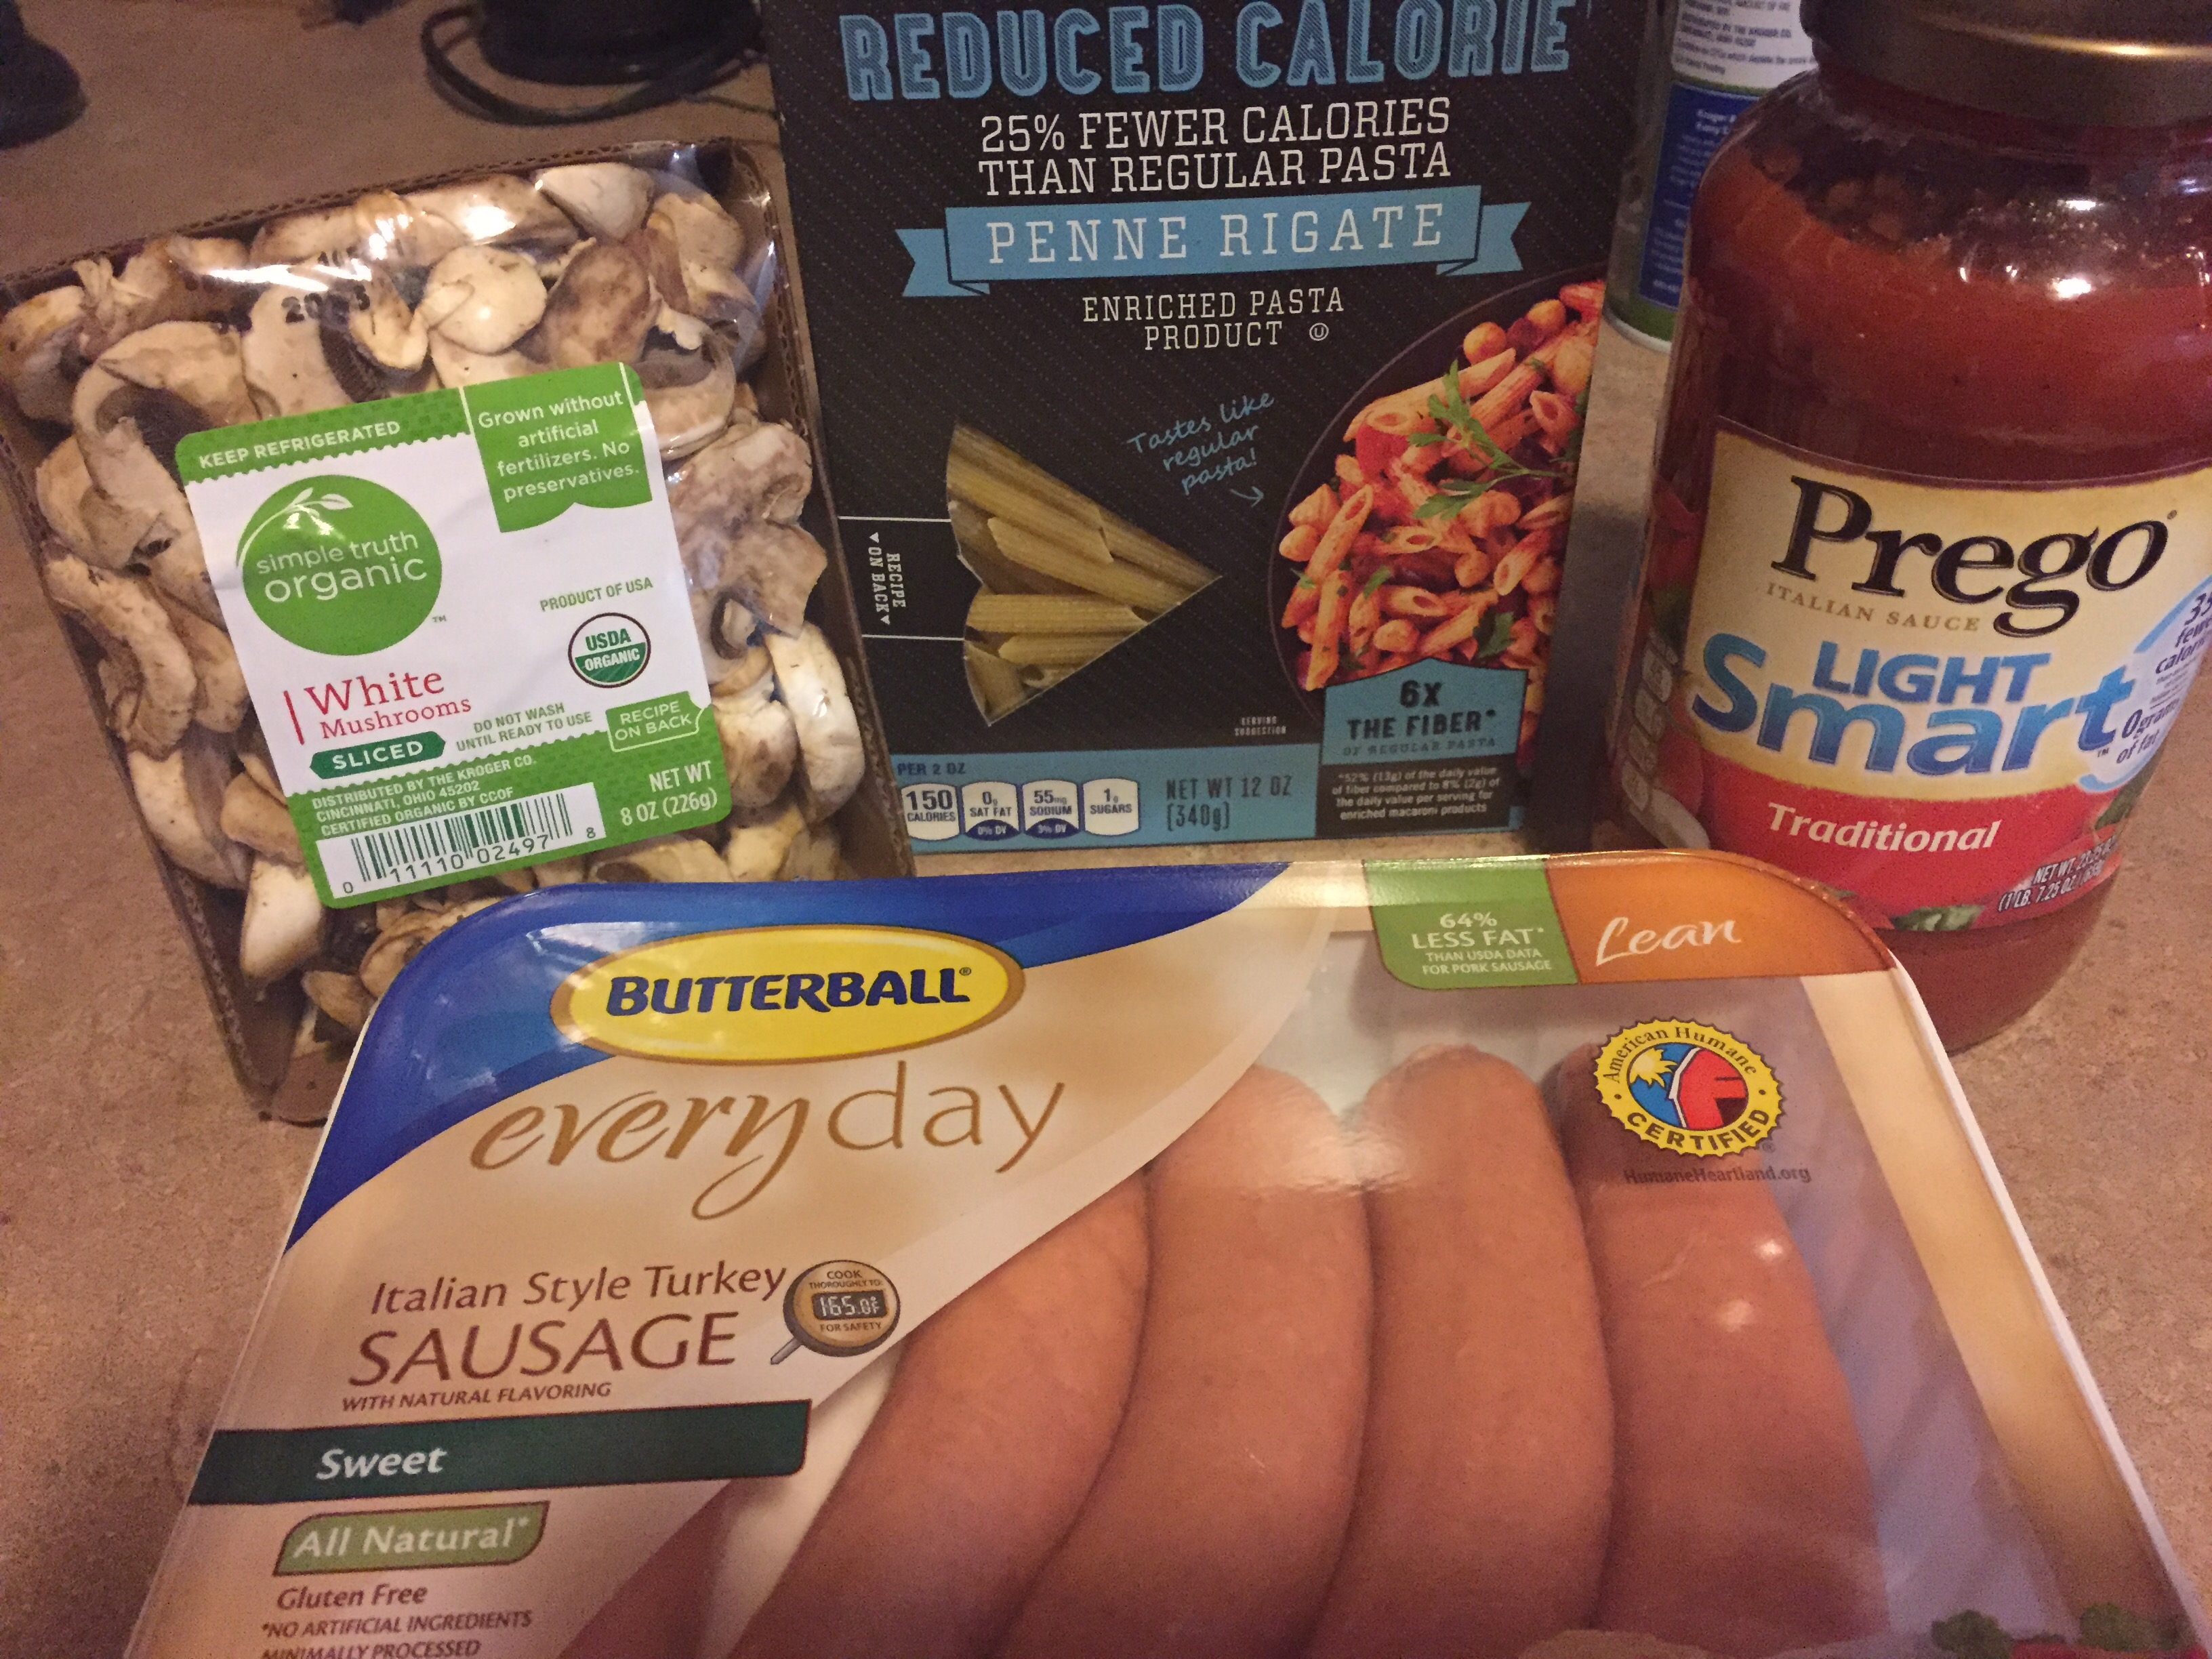
- 3 butterball sweet Italian turkey sausage links, sliced about 1/2 inch thick
- 12 oz of reduced calorie penne
- 1 container of pre sliced mushrooms
- 1 jar of prego light smart pasta sauce (32 oz) or mommy’s on a diet homemade marinara
- 32 oz of water
- 1 tsp salt
- 1 TBSP minced garlic
- 1 tsp oregano
- 1/2 cup white wine* (opt) or water
- shredded parm and crushed red peppers for garnish (opt)
*white wine not included in calorie count
Directions:
Stovetop:
- Fill a large pot with about 4 cups of water, and bring to a boil. Add penne and cook according to package directions.
- While water is boiling, warm 1 tbsp of oil in a large skillet. Cook turkey sausage slices in the skillet until they are browned on the outside and cooked through.
- Use about 1/2 cup of water or white wine (opt) to deglaze the pan, meaning, pour the liquid in and use a spoon to scrape all the bits off the bottom so nothing is sticking to the bottom of the pan.
- Add pasta sauce, mushrooms, salt, garlic, and oregano to pan. cover and cook on low, stirring occasionally while you continue working on pasta.
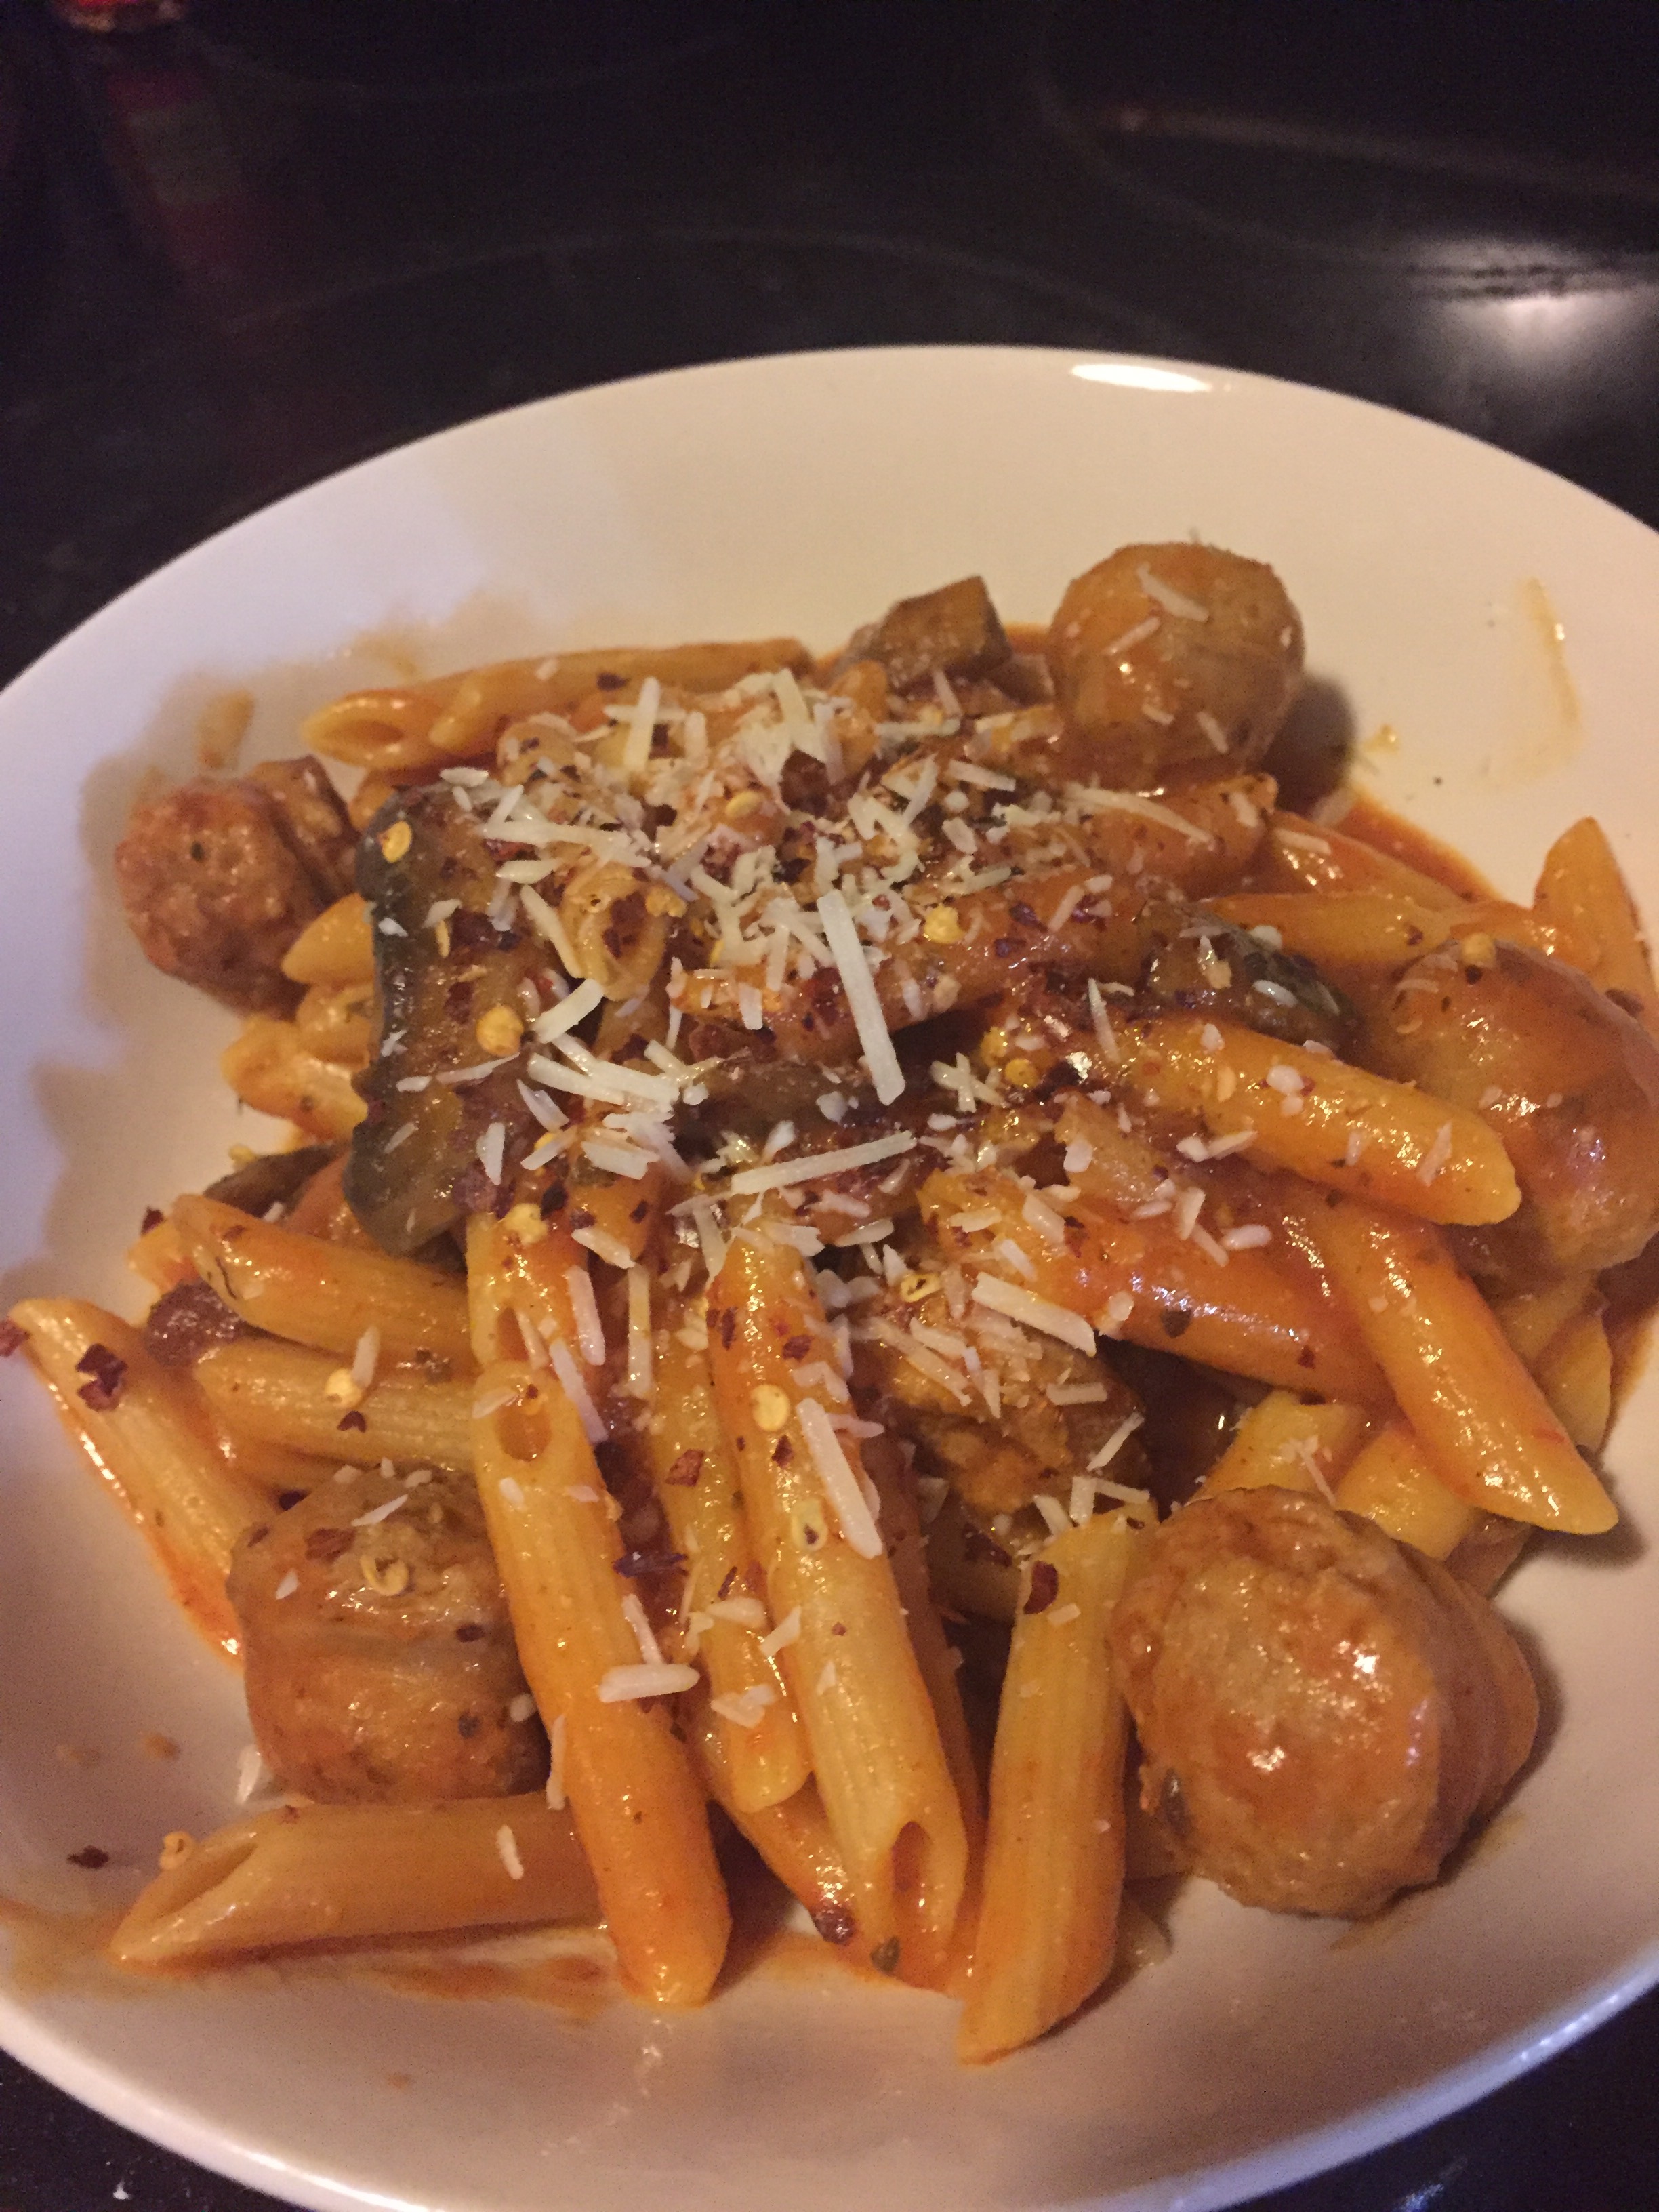
- Once pasta has finished cooking, drain it well. Once mushrooms have cooked down, add your pasta to the large skillet and toss sauce and pasta together.
Instantpot:
- heat instant pot on sautee function. Add oil, and then sausages to cook.
- Cook sausages in oil just until they are browned on outside.
- Literally add all other ingredients in, starting with sauce, then mushrooms, then seasonings, then water. Don’t stir it up.
- Once everything else is in the pot, add pasta. Poke all pasta down inside the water and make sure no pasta is exposed (it won’t cook if it’s exposed).
- Set your Instantpot to manual for 6 minutes. Quick release as soon as timer goes off.
- If there is too much liquid when it’s done, either stir it and then replace cover and leave it sitting covered in the pot for about 5 minutes: or you can stir it up and heat on sautee, adjusting the heat to “less” and stir continuously until sauce thickens.
Makes 5 servings= 378 calories per serving